1. Build Model Part
|
import torch
from torch import nn

# make device agnostic code
device = "cuda" if torch.cuda.is_available() else "cpu"
device
'cpu' 或
'cuda'
|
2. Build Model Step
|
# 1:构建模型类(nn.Module的子类)
# 1:construct model class that subclass nn.Module
class CircleModelV0(nn.Module):
    def __init__(self):
        super().__init__()
        # 2:构建2层nn.Linear,能处理X和y的输入输出形状的线性层
        # 2:create 2 nn.Linear layer capable of handling X and y input and output shape

        # 获取2个特征(X),生产5个特征:take in 2 feature(X),produce 5 feature
        self.layer_1 = nn.Linear(in_features=2,out_features=5)

        # 获取5个特征,生成1个特征(y):takes in 5 feature,produce 1 feature(y)
        self.layer_2 = nn.Linear(in_features=5,out_features=1)

    # 3:定义包含正向传递计算的正向方法
    # 3:define forward() containing forward pass computation
    def forward(self,x):
        # 返回layer_2的输出,这是一个单一的特征,与y的形状相同
        # return output of layer_2,a single feature,the same shape as y

        # 计算首先经过层1,然后层1的输出经过层2
        # computation go through layer_1 first then output of layer_1 go through layer_2
        return self.layer_2(self.layer_1(x))

# 4:创建模型的实例并将其发送到目标设备
# 4:create model instance and send to target device
model_0 = CircleModelV0().to(device)
model_0
CircleModelV0(
(layer_1): Linear(in_features=2, out_features=5, bias=True)
(layer_2): Linear(in_features=5, out_features=1, bias=True)
)
|
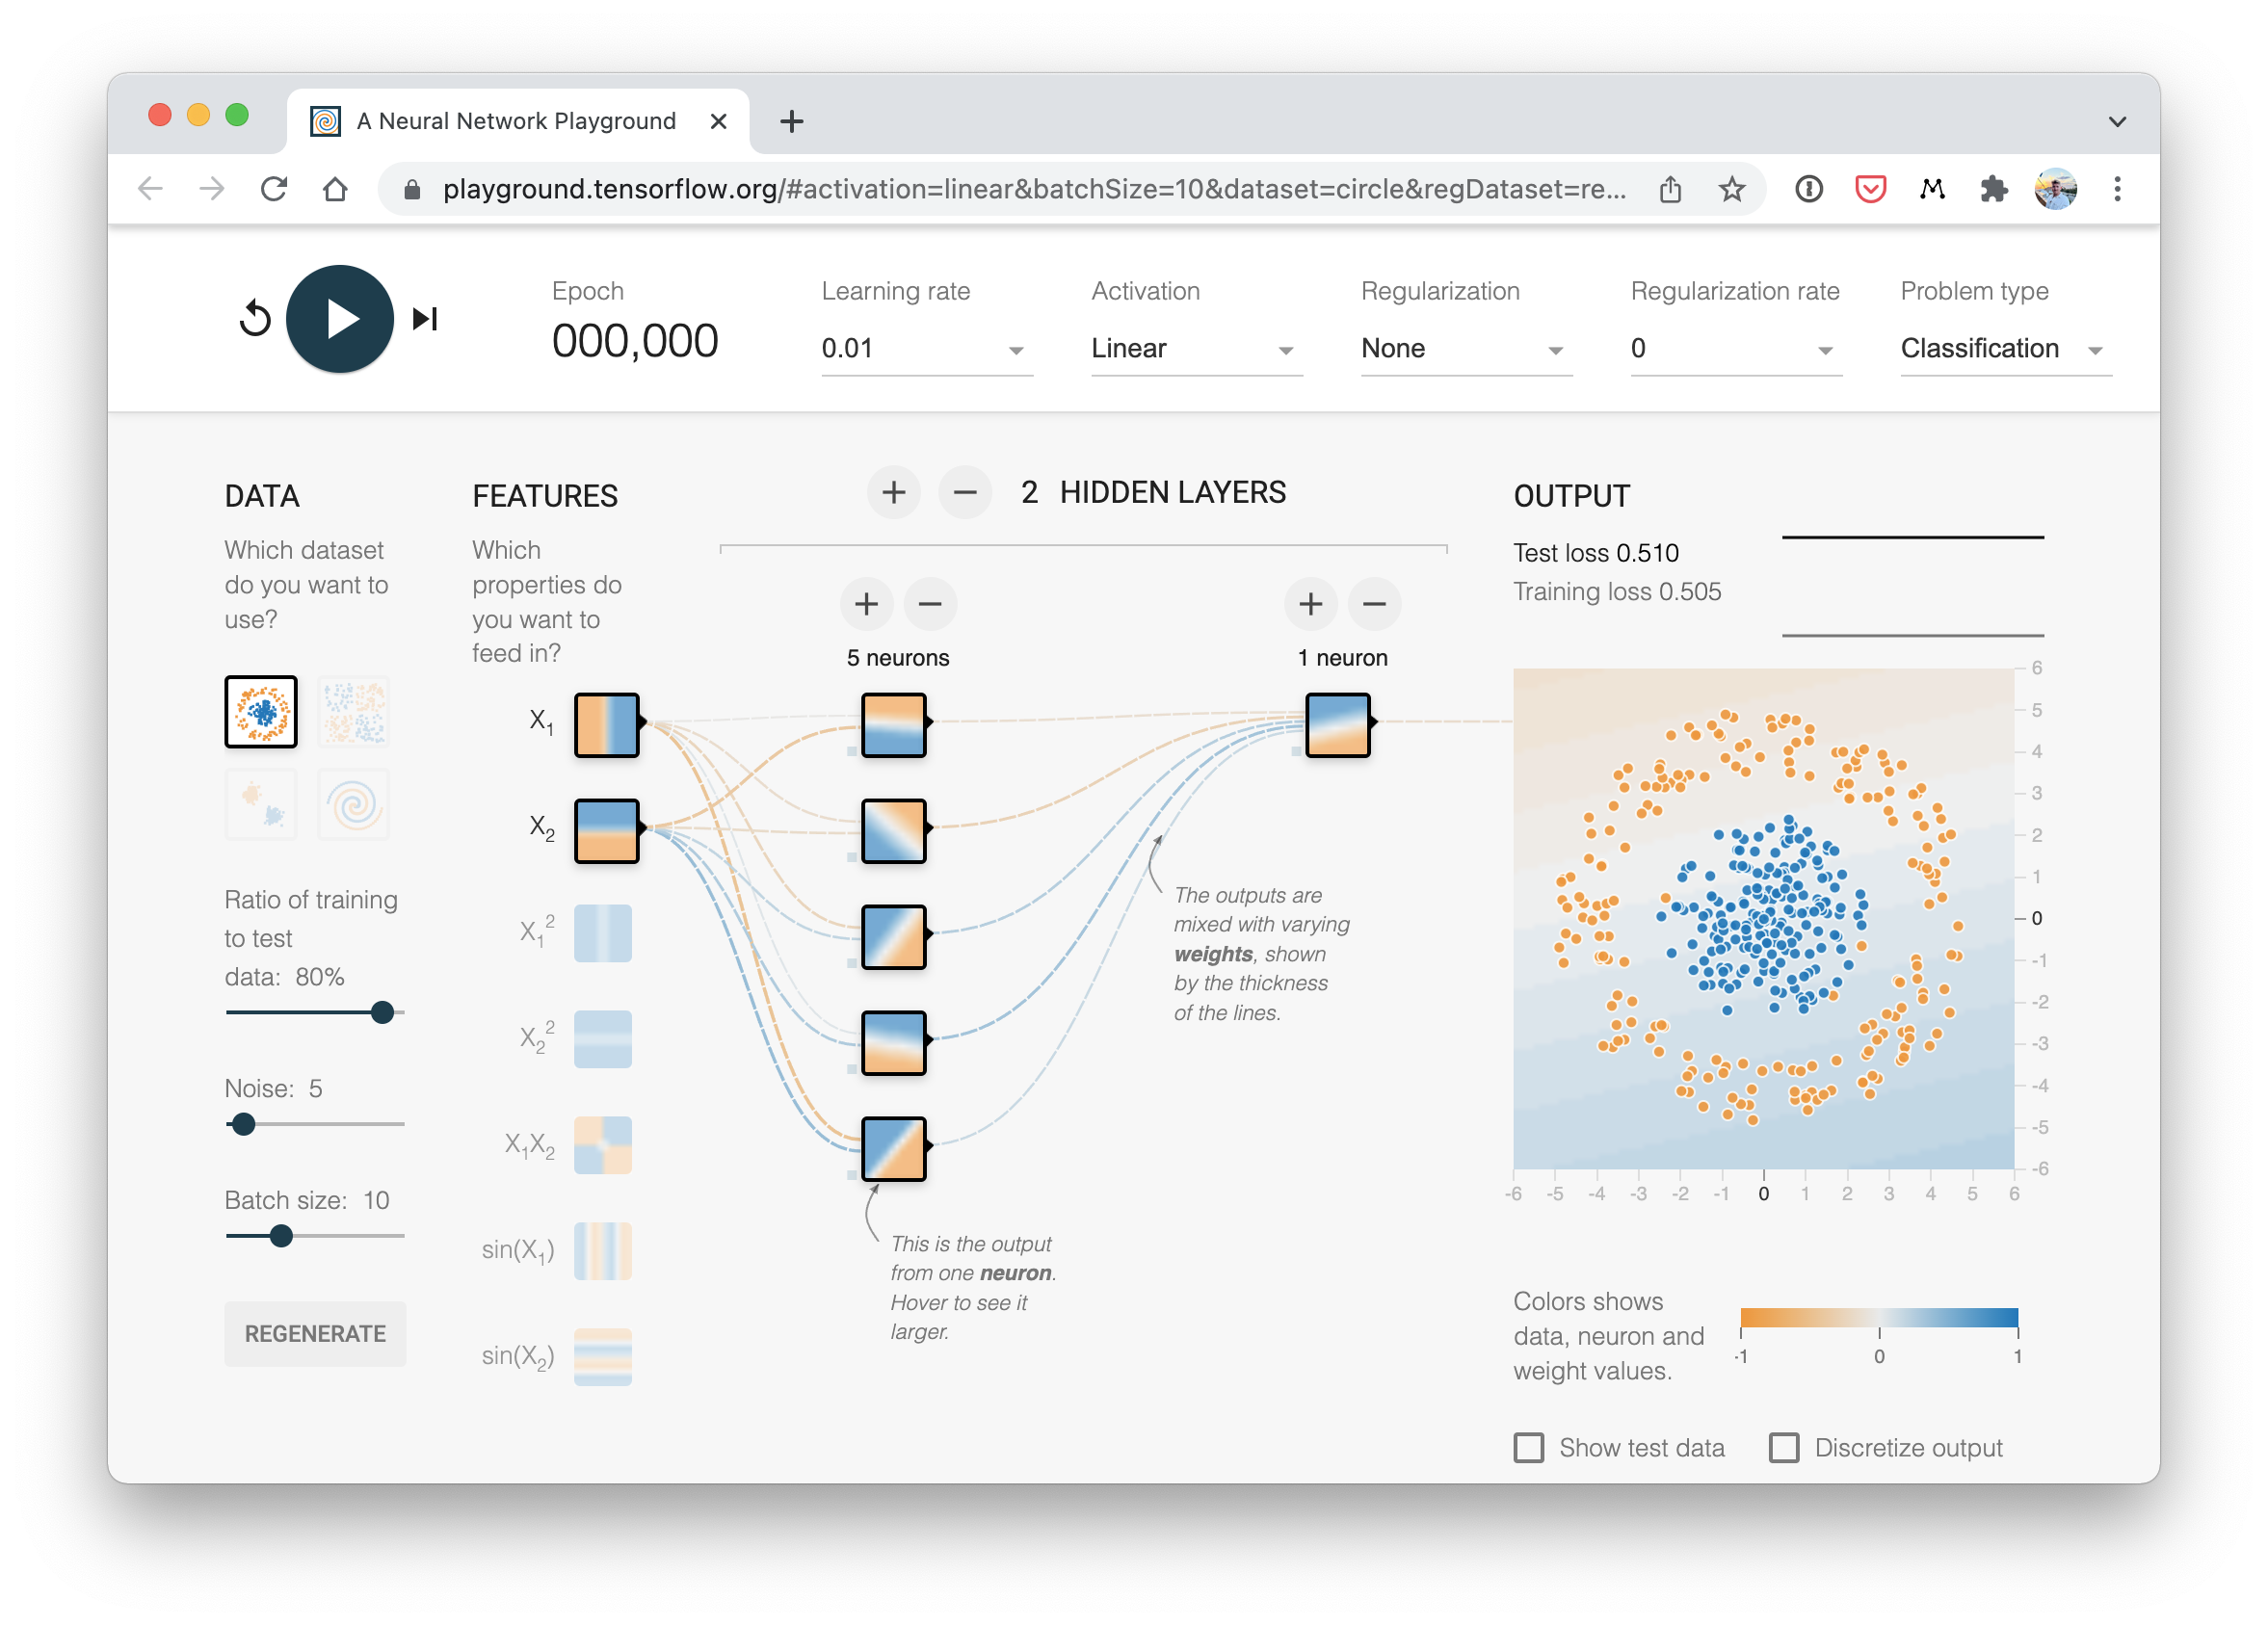
3. TF Playground
-
可使用nn.Sequential执行以上相同操作,nn.Sequential按层出现
的顺序对输入数据执行前向传递计算forward pass computation;

# Replicate CircleModelV0 with nn.Sequential
model_0 = nn.Sequential(
    nn.Linear(in_features=2, out_features=5),
    nn.Linear(in_features=5, out_features=1)
).to(device)

model_0
Sequential(
(0): Linear(in_features=2, out_features=5, bias=True)
(1): Linear(in_features=5, out_features=1, bias=True)
)
|
# make prediction with model
untrained_pred = model_0(X_test.to(device))
print(f"Length of prediction: {len(untrained_pred)}, Shape: {untrained_pred.shape}")
print(f"Length of test sample: {len(y_test)}, Shape: {y_test.shape}")
print(f"\nFirst 10 prediction:\n{untrained_pred[:10]}")
print(f"\nFirst 10 test label:\n{y_test[:10]}")
Length of prediction: 200, Shape: torch.Size([200, 1])
Length of test sample: 200, Shape: torch.Size([200])
First 10 prediction:
tensor([[0.2625],
[0.2737],
[0.3577],
[0.2350],
[0.5554],
[0.5607],
[0.4355],
[0.5032],
[0.3492],
[0.2766]], grad_fn=<SliceBackward0>)
First 10 test label:
tensor([1., 0., 1., 0., 1., 1., 0., 0., 1., 0.])4. Setup LF Optimizer
|
| Loss Function/Optimizer | Problem Type | PyTorch Code |
|---|---|---|
Optimizer |
||
SGD Optimizer |
Classification,Regression,其它 |
torch.optim.SGD() |
Adam Optimizer |
Classification,Regression,其它 |
torch.optim.Adam() |
Loss Function |
||
Binary Cross Entropy Loss |
Binary Classification |
torch.nn.BCELoss或torch.nn.BCELossWithLogits |
Cross Entropy Loss |
MutliClass Classification |
torch.nn.CrossEntropyLoss |
MAE or L1 Loss |
Regression |
torch.nn.L1Loss |
MSE or L2 Loss |
Regression |
torch.nn.MSELoss |
|
# create loss function
# loss_fn = nn.BCELoss() # BCELoss = no sigmoid built-in
loss_fn = nn.BCEWithLogitsLoss() # BCEWithLogitsLoss = sigmoid built-in

# create optimizer
optimizer = torch.optim.SGD(params=model_0.parameters(),lr=0.1)
5. Evaluation Metric
|
# calculate accuracy (classification metric)
def accuracy_fn(y_true, y_pred):
    # torch.eq() calculate where two tensor are equal
    correct = torch.eq(y_true,y_pred).sum().item()
    accuracy = (correct / len(y_pred)) * 100
    return accuracy